DAY 65 - 스프링 프레임워크 - MVC (2024.10.08)
복습

Servlet C
Java M
JSP V
자바 따로 웹 따로 하자
요청했을 때 JSP로 못가게 하려고 함. WEB-INF로 넣어버림
webapp는 접근 가능하지만 WEB-INF는 접근할 수 없기 때문에 안으로 넣어버려서 JSP에 직접적으로 접근 못하게 하는 것이다.
http://localhost:8080/Chapter06/WEB-INF/hello.do

Client가 요청을 하면 DispatcherServlet이 받는다.
Controller가 하는 역할은 제어하는 역할이 아니라 받아주는역할이다.
요청이 들어오면 현재 DispatcherServlet으로부터 받아온다.
Client가 회원가입.do / 로그인.do를 하면 DispatcherServlet로 넘어온다.
그리고 Controller라는 어노테이션이 붙은 클래스를 다 뒤진다. HandlerMapping의 도움을 받아서 !
@ Controller를 먼저 찾고 회원가입.do를 찾아야하므로 RequestMapping에서 회원가입.do를 찾는다.
DispatcherServlet와 Controller를 연결해주는 역할을 HandlerMapping이 하는 것 !
그리고 ModelAndView에 담는다. ViewResolver를 통해서 생성할 뷰를 결정하고
forward 방식을 통해서 View, 즉 화면에 뿌린다.
http://localhost:8080/Chapter06/hello.do
↓요청
DispatcherServlet.java
↓ HandlerMapping
HelloController.java

@Controller 붙은 애에서 @ RequestMapping까지 찾아오는 것 !!
데이터를 담을 때 ModelAndView에 담고
우리가 가야할 jsp파일을 알려준다.
<?xml version="1.0" encoding="UTF-8"?>
<beans xmlns="http://www.springframework.org/schema/beans"
	xmlns:xsi="http://www.w3.org/2001/XMLSchema-instance"
	xmlns:context="http://www.springframework.org/schema/context"
	xsi:schemaLocation="http://www.springframework.org/schema/beans http://www.springframework.org/schema/beans/spring-beans.xsd
		http://www.springframework.org/schema/context http://www.springframework.org/schema/context/spring-context-4.3.xsd">

	<bean id="viewResolver" class="org.springframework.web.servlet.view.InternalResourceViewResolver">
		<property name="prefix" value="/WEB-INF/"></property>
		<property name="suffix" value=".jsp"></property>
	</bean>

	<bean id="helloController" class="com.contoller.HelloController"></bean>
</beans>
이 파일을 통해서 /WEB-INT/hello.jsp를 화면에 보여줘야 하는 것을 알려주는 것이다 !!

WAC (Web Application Context) 등록
1. ContextLoaderListener가 생성하는 Root WAC
- 웹 환경과 독립적인 빈 등록 (웹과 전혀 상관없다.)
- 디폴트 설정 파일 /WEB-INF/applicationContext.xml 으로 설정 된다
- 서비스계층과 데이터 액세스 계층을 포함해서 웹 환경과 직접 관련이 없는 모든 빈들을 여기에 등록 한다
- 예를 들어, DAO(Data Access Object)와 서비스 클래스가 여기에 포함된다.
→ 만약에 사용할 이름이 다르거나 설정파일이 여러 개인 경우
contextConfigLocation 파라미터를 추가해서 설정해주면 된다
2. DispatcherServlet이 생성하는 WAC
- DispatcherServlet이 직접 사용하는 컨트롤러를 포함한 웹 관련 빈을 등록
- 디폴트 설정 파일 /WEB-INF/서블릿이름-servlet.xml으로 설정된다
- Dispatcher WAC는 사용자의 요청을 처리하는 컨트롤러와 이와 관련된 컴포넌트(예: 핸들러, 뷰 리졸버 등)를 여기에 등록한다.
- 예를 들어, Spring MVC에서 컨트롤러가 이 컨텍스트에 등록되어 요청을 처리한다.
→ 만약에 사용할 이름이 다르거나 설정파일이 여러 개인 경우
contextConfigLocation 파라미터를 추가해서 설정해주면 된다
- Root WAC는 웹과 독립적인 빈들을 등록하고, 주로 비즈니스 로직과 데이터 액세스를 처리한다.
- Dispatcher WAC는 웹 요청과 관련된 빈들을 등록하고, 사용자 요청을 처리하는 데 사용된다.


예전에 했던 저런걸 하려는 것이다.
web.xml
WAC
default : dispatcherServlet-servlet.xml
이름이나 위치를 변경
  <!--  WAC
  => default : dispatcherServlet-servlet.xml
  => 이름이나 위치를 변경
   -->
  <servlet>
	<servlet-name>dispatcherServlet</servlet-name>
	<servlet-class>org.springframework.web.servlet.DispatcherServlet</servlet-class>
  	<init-param>
  		<param-name>contextConfigLocation</param-name>
  		<param-value>/WEB-INF/spring/appServlet/servlet-context.xml</param-value>
  	</init-param>
  </servlet>
  <servlet-mapping>
	<servlet-name>dispatcherServlet</servlet-name>
	<url-pattern>*.do</url-pattern>
  </servlet-mapping>
위치와 이름을 다 바꿔버렸다.
없으니까 만들자 !!

이제는 dispatcherServlet-servlet.xml로 안가고 servlet-context.xml로 가게 하는 것이다.
servlet-context.xml
<bean id="viewResolver" class="org.springframework.web.servlet.view.InternalResourceViewResolver">
<property name="prefix" value="/WEB-INF/"></property>
<property name="suffix" value=".jsp"></property>
</bean>
<bean id="helloController" class="com.contoller.HelloController"></bean>
이 코드 복붙하기 !
<?xml version="1.0" encoding="UTF-8"?>
<beans xmlns="http://www.springframework.org/schema/beans"
	xmlns:xsi="http://www.w3.org/2001/XMLSchema-instance"
	xmlns:context="http://www.springframework.org/schema/context"
	xsi:schemaLocation="http://www.springframework.org/schema/beans http://www.springframework.org/schema/beans/spring-beans.xsd
		http://www.springframework.org/schema/context http://www.springframework.org/schema/context/spring-context-4.3.xsd">
	<bean id="viewResolver" class="org.springframework.web.servlet.view.InternalResourceViewResolver">
		<property name="prefix" value="/WEB-INF/"></property>
		<property name="suffix" value=".jsp"></property>
	</bean>

	<bean id="helloController" class="com.contoller.HelloController"></bean>
</beans>
서버를 껐다 켰을 때 똑같이 결과가 나와야한다.
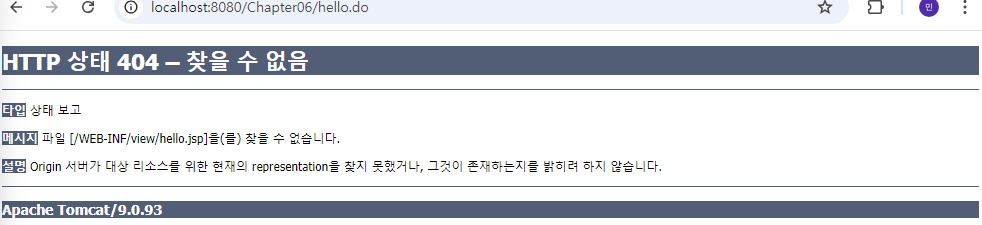
URL에서 바로 JSP가 실행되지 않게 하기위해서 /WEB-INF에 JSP 파일을 작성한다.
http://localhost:8080/Chapter06/WEB-INF/hello.jsp를 실행할 수 없다.
mav.setViewName("/view/hello"); // JSP 파일이름 => /WEB-INF//view/hello.jsp
<bean id="viewResolver" class="org.springframework.web.servlet.view.InternalResourceViewResolver">
<property name="prefix" value="/WEB-INF/"></property>
<property name="suffix" value=".jsp"></property>
</bean>
이런식으로 하면 //가 두 개 잡히게 되므로 하나는 빼야한다.
<?xml version="1.0" encoding="UTF-8"?>
<beans xmlns="http://www.springframework.org/schema/beans"
	xmlns:xsi="http://www.w3.org/2001/XMLSchema-instance"
	xmlns:context="http://www.springframework.org/schema/context"
	xsi:schemaLocation="http://www.springframework.org/schema/beans http://www.springframework.org/schema/beans/spring-beans.xsd
		http://www.springframework.org/schema/context http://www.springframework.org/schema/context/spring-context-4.3.xsd">
	<bean id="viewResolver" class="org.springframework.web.servlet.view.InternalResourceViewResolver">
		<property name="prefix" value="/WEB-INF"></property>
		<property name="suffix" value=".jsp"></property>
	</bean>

	<bean id="helloController" class="com.contoller.HelloController"></bean>
</beans>
package com.contoller;
import org.springframework.stereotype.Controller;
import org.springframework.web.bind.annotation.RequestMapping;
import org.springframework.web.bind.annotation.RequestMethod;
import org.springframework.web.servlet.ModelAndView;
@Controller
public class HelloController {
@RequestMapping(value="hello.do", method = RequestMethod.GET)
public ModelAndView hello() { //사용자가 만든 콜백메서드
ModelAndView mav = new ModelAndView();
mav.addObject("result", "Hello Spring MVC!!");
//mav.setViewName("hello"); //JSP 파일이름 => /WEB-INF/hello.jsp / 화면에 보여줘야할 이름을 실어주면 된다.
mav.setViewName("view/hello"); // JSP 파일이름 => /WEB-INF/view/hello.jsp
return mav;
}
}


HelloController.java
	@RequestMapping(value="hello2.do", method = RequestMethod.GET)
	public String hello2(){
		return "/welcome";
	}
http://localhost:8080/Chapter06/hello2.do

스프링에서 리턴 타입이 String이면 단순 문자열이 아니라 JSP 파일명으로 인식한다.
원래는 요청이 들어오면 DispatcherServlet로 갔다가 Controller로 갔다 다시 DispatcherServlet로 가고 그리고나서 화면에 뿌려주는 과정이지만 우리는 여기서 DispatcherServlet로 다시가는 과정을 생략하고 화면에 뿌려주려고 하는 것이다.
만약 단순 문자열로 처리하여 브라우저에 바로 뿌리려면 @ResponseBody를 써야한다.
	@RequestMapping(value="hello2.do", method = RequestMethod.GET)
	@ResponseBody
	public String hello2(){
		return "/welcome";
	}
한글을 return 해보자 !!
	@RequestMapping(value="hello2.do", method = RequestMethod.GET)
	@ResponseBody
	public String hello2(){
		//return "/welcome";
		return "안녕하세요 스프링!!";
	}
한글이 다 깨진다 !!!
한글처리를 해줘야한다 !
produces = "text/html; charset=UTF-8" 추가하기
	@RequestMapping(value="hello2.do", method = RequestMethod.GET, produces = "text/html; charset=UTF-8")
	@ResponseBody
	public String hello2(){
		//return "/welcome";
		return "안녕하세요 스프링!!";
	}
[문제]
Project : Chapter06_1 (Dynamic Web Project)
Package : com.controller
Class : SumController.java
Package : com.bean
Class : SumDTO.java
Foler : /WEB-INF/sum
File : input.jsp
result.jsp
스프링 설정 파일 (WAC) → 변경하시오
/WEB-INF/dispatcher-servlet.xml → /WEB-INF/spring/appServlet/servlet-context.xml
[실행결과]
http://localhost:8080/Chapter06_1/input.do

http://localhost:8080/Chapter06_1/result.do

project명에서 우클릭 - Spring - Add Spring Project Nature
project명에서 우클릭 - Configure - Convert to Maven Project
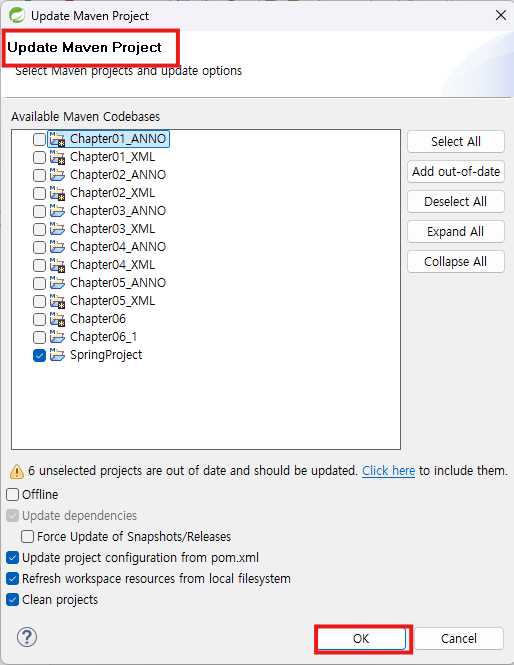
project명에서 우클릭 - Maven - Update Project...
pom.xml
<project xmlns="http://maven.apache.org/POM/4.0.0" xmlns:xsi="http://www.w3.org/2001/XMLSchema-instance" xsi:schemaLocation="http://maven.apache.org/POM/4.0.0 https://maven.apache.org/xsd/maven-4.0.0.xsd">
  <modelVersion>4.0.0</modelVersion>
  <groupId>Chapter06_1</groupId>
  <artifactId>Chapter06_1</artifactId>
  <version>0.0.1-SNAPSHOT</version>
  <packaging>war</packaging>
  <build>
    <plugins>
      <plugin>
        <artifactId>maven-compiler-plugin</artifactId>
        <version>3.8.1</version>
        <configuration>
          <release>11</release>
        </configuration>
      </plugin>
      <plugin>
        <artifactId>maven-war-plugin</artifactId>
        <version>3.2.3</version>
      </plugin>
    </plugins>
  </build>
  <dependencies>
  	<!-- Spring -->
	<dependency>
		<groupId>org.springframework</groupId>
		<artifactId>spring-context</artifactId>
		<version>5.3.37</version>
	</dependency>

	<dependency>
	    <groupId>org.springframework</groupId>
	    <artifactId>spring-webmvc</artifactId>
	    <version>5.3.37</version>
	</dependency>

	<!-- JSTL -->
	<dependency>
	    <groupId>javax.servlet</groupId>
	    <artifactId>jstl</artifactId>
	    <version>1.2</version>
	</dependency>

	<dependency>
	    <groupId>org.projectlombok</groupId>
	    <artifactId>lombok</artifactId>
	    <version>1.18.30</version>
	    <scope>provided</scope>
	</dependency>
  </dependencies>
</project>
web.xml
스프링 설정 파일 (WAC) → 변경하시오
/WEB-INF/dispatcher-servlet.xml → /WEB-INF/spring/appServlet/servlet-context.xml
<?xml version="1.0" encoding="UTF-8"?>
<web-app xmlns:xsi="http://www.w3.org/2001/XMLSchema-instance" xmlns="http://xmlns.jcp.org/xml/ns/javaee" xsi:schemaLocation="http://xmlns.jcp.org/xml/ns/javaee http://xmlns.jcp.org/xml/ns/javaee/web-app_4_0.xsd" id="WebApp_ID" version="4.0">
  <display-name>Chapter06_1</display-name>

  <servlet>
	<servlet-name>dispatcher</servlet-name>
	<servlet-class>org.springframework.web.servlet.DispatcherServlet</servlet-class>
  	<init-param>
  		<param-name>contextConfigLocation</param-name>
  		<param-value>/WEB-INF/spring/appServlet/servlet-context.xml</param-value>
  	</init-param>
  </servlet>

  <servlet-mapping>
	<servlet-name>dispatcher</servlet-name>
	<url-pattern>*.do</url-pattern>
  </servlet-mapping>

  <welcome-file-list>
    <welcome-file>index.html</welcome-file>
    <welcome-file>index.htm</welcome-file>
    <welcome-file>index.jsp</welcome-file>
    <welcome-file>default.html</welcome-file>
    <welcome-file>default.htm</welcome-file>
    <welcome-file>default.jsp</welcome-file>
  </welcome-file-list>
</web-app>
/WEB-INF/spring/appServlet/servlet-context.xml
<?xml version="1.0" encoding="UTF-8"?>
<beans xmlns="http://www.springframework.org/schema/beans"
	xmlns:xsi="http://www.w3.org/2001/XMLSchema-instance"
	xmlns:context="http://www.springframework.org/schema/context"
	xsi:schemaLocation="http://www.springframework.org/schema/beans http://www.springframework.org/schema/beans/spring-beans.xsd
		http://www.springframework.org/schema/context http://www.springframework.org/schema/context/spring-context-4.3.xsd">

<bean id="viewResolver" class="org.springframework.web.servlet.view.InternalResourceViewResolver">
		<property name="prefix" value="/WEB-INF"></property>
		<property name="suffix" value=".jsp"></property>
	</bean>

	<bean id="sumController" class="com.controller.SumController"></bean>
</beans>
<bean id="sumController" class="com.controller.SumController"></bean> 이렇게 해서 빈설정하거나
SumController.java
@Component -- 이걸로 설정하기
@Controller
public class SumController {
package com.controller;

import org.springframework.stereotype.Controller;
import org.springframework.web.bind.annotation.RequestMapping;
import org.springframework.web.bind.annotation.RequestMethod;
import org.springframework.web.bind.annotation.RequestParam;
import org.springframework.web.servlet.ModelAndView;

@Controller
public class SumController {
	@RequestMapping(value="input.do", method = RequestMethod.GET)
	public String input(){
		return "/sum/input"; //=? /WEB-INF/sum/input.jsp
	}
input.jsp
<%@ page language="java" contentType="text/html; charset=UTF-8"
    pageEncoding="UTF-8"%>
<!DOCTYPE html>
<html>
<head>
<meta charset="UTF-8">
<title>Insert title here</title>
<style type="text/css">
td {
	padding: 5px;
}

</style>
</head>
<body>
	<form action="result.do">
        <table border="1" style="border-collapse: collapse;">
            <tr>
                <td width="50" align="center">X</td>
                <td><input type="text" name="x"></td>
            </tr>
            <tr>
                <td width="50" align="center">Y</td>
                <td><input type="text" name="y"></td>
            </tr>
            <tr>
                <td colspan="2" style="text-align: center;">
                	<input type="submit" value="계산">
                	<input type="reset" value="취소">
                </td>
            </tr>
        </table>
	</form>
</body>
</html>
SumController.java
@RequestParam 이용하기
	@RequestMapping(value="result.do", method = RequestMethod.GET)
	public ModelAndView result(@RequestParam int x, @RequestParam int y) {
		ModelAndView mav = new ModelAndView();
		mav.addObject("x", x);
		mav.addObject("y", y);
		mav.setViewName("/sum/result");
		return mav;
	}
}
result.jsp
<%@ page language="java" contentType="text/html; charset=UTF-8"
    pageEncoding="UTF-8"%>
<!DOCTYPE html>
<html>
<head>
<meta charset="UTF-8">
<title>Insert title here</title>
</head>
<body>
	<h3>${x } + ${y } = ${x+y }</h3>
</body>
</html>

[ 강사님 답 1]
x와 y 값을 jsp가 직접 받게하는 방법으로도 보여주셨다.
SumController.java
package com.controller;

import org.springframework.stereotype.Controller;
import org.springframework.web.bind.annotation.RequestMapping;
import org.springframework.web.bind.annotation.RequestMethod;

@Controller
public class SumController {
	@RequestMapping(value="input.do", method = RequestMethod.GET)
	public String input(){
		return "/sum/input"; //=? /WEB-INF/sum/input.jsp
	}

	@RequestMapping(value="result.do", method = RequestMethod.GET)
	public String result() {
		return "/sum/result";
	}
}
result.jsp
<%@ page language="java" contentType="text/html; charset=UTF-8"
    pageEncoding="UTF-8"%>
<!DOCTYPE html>
<html>
<head>
<meta charset="UTF-8">
<title>Insert title here</title>
</head>
<body>
	<h3>${param.x } + ${param.y } = ${param.x + param.y }</h3>
</body>
</html>
[ 강사님 답 2]
jsp가 받지 않고 SumController가 직접 받게 하기 !!
내가 위에서 한 방법이랑 똑같다.
[ 데이터 값 없을 때 ]
이런식으로 데이터 안 넣게되면 400 에러가 뜬다.
400 error - 데이터가 안들어왔다는 뜻 !!

public ModelAndView result(@RequestParam(required = false, defaultValue = "0") String x,
@RequestParam(required = false, defaultValue = "0") String y) {
	@RequestMapping(value="result.do", method = RequestMethod.GET)
	public ModelAndView result(@RequestParam(required = false, defaultValue = "0") String x,
			                   @RequestParam(required = false, defaultValue = "0") String y) {
		ModelAndView mav = new ModelAndView();
		mav.addObject("x", x);
		mav.addObject("y", y);
		mav.setViewName("/sum/result");
		return mav;
	}
String으로 해도 계산이 되나???? 된다 !! 타입을 가리지 않는다.

값을 안 넣어도 알아서 0으로 처리해준다.
[ Map ]
Map으로 받는 방법 !! <Key, Value> "x", 25 "y", 36
데이터가 적당량 끊어질 때는 map으로 받아도 좋다.
	@RequestMapping(value="result.do", method = RequestMethod.GET)
	public String result(@RequestParam Map<String, String> map, ModelMap modelMap){
		modelMap.put("x", map.get("x"));
		modelMap.put("y", map.get("y"));
		return "/sum/result";
	}
@RequestParam Map<String, String> map -- 데이터 받는애
ModelMap modelMap -- 데이터 보내는 애
[ DTO ]
회원가입처럼 데이터가 너무 많으면 dto에 실는게 좋다 !!
Package : com.bean
Class : SumDTO.java
package com.bean;

import lombok.Getter;
import lombok.Setter;

@Getter
@Setter
public class SumDTO {
	private int x;
	private int y;
}
SumController.java
@RequestParam을 못 쓴다.
public String result(@ModelAttribute SumDTO sumDTO, Model model){
	@RequestMapping(value="result.do", method = RequestMethod.GET)
	public String result(@ModelAttribute SumDTO sumDTO, Model model){
		model.addAttribute("x", sumDTO.getX());
		model.addAttribute("y", sumDTO.getY());
		return "/sum/result";
	}
3개 중에 골라서 쓰면 된다.
ModelAndView mav = new ModelAndView();
ModelMap modelMap
Model model

많은 답들이 있는데 나중에 다 섞어서 쓸 예정이다.... 다 알아두자구 !!!
[ 문제 2 ]
Project : Chapter06_1
Package : com.controller
Class : SungJukController.java
Package : com.bean
Class : SungJukDTO.java
Field : name, kor, eng, math, tot, avg
Foler : /WEB-INF/sungJuk
File : input.jsp
result.jsp
스프링 설정 파일
/WEB-INF/dispatcher-servlet.xml → /WEB-INF/spring/appServlet/mvc-context.xml
[실행결과]
namespace
http://localhost:8080/Chapter06_1/sungJuk/input.do

namespace
http://localhost:8080/Chapter06_1/sungJuk/result.do
servlet-context.xml
<context:component-scan base-package="com.controller" />
<?xml version="1.0" encoding="UTF-8"?>
<beans xmlns="http://www.springframework.org/schema/beans"
	xmlns:xsi="http://www.w3.org/2001/XMLSchema-instance"
	xmlns:context="http://www.springframework.org/schema/context"
	xsi:schemaLocation="http://www.springframework.org/schema/beans http://www.springframework.org/schema/beans/spring-beans.xsd
		http://www.springframework.org/schema/context http://www.springframework.org/schema/context/spring-context-4.3.xsd">

	<bean id="viewResolver" class="org.springframework.web.servlet.view.InternalResourceViewResolver">
		<property name="prefix" value="/WEB-INF"></property>
		<property name="suffix" value=".jsp"></property>
	</bean>

	<context:component-scan base-package="com.controller" />
</beans>
여기서 이렇게 잡았기 때문에
@Controller
public class SungJukController {
이렇게만 해도 빈이 생성이 된다 !!
SungJukController.java

이렇게 이름이 같아버리면 먼저 만난거부터 실행이된다.

그러므로 이런식으로 앞에 폴더 이름을 적어줘야 구분이 된다 !!
SungJukController.java
package com.controller;

import org.springframework.stereotype.Controller;
import org.springframework.web.bind.annotation.ModelAttribute;
import org.springframework.web.bind.annotation.RequestMapping;
import org.springframework.web.bind.annotation.RequestMethod;
import org.springframework.web.servlet.ModelAndView;

import com.bean.SungJukDTO;

@Controller
public class SungJukController {
	@RequestMapping(value="sungJuk/input.do", method = RequestMethod.GET)
	public String input(){
		return "/sungJuk/input";
	}
input.jsp
<%@ page language="java" contentType="text/html; charset=UTF-8"
    pageEncoding="UTF-8"%>
<!DOCTYPE html>
<html>
<head>
<meta charset="UTF-8">
<title>Insert title here</title>
<style type="text/css">
td {
	padding: 5px;
}
</style>
</head>
<body>
<form action="result.do" method="post">
        <table border="1" style="border-collapse: collapse;">
            <tr>
                <td width="50" align="center">이름</td>
                <td><input type="text" name="name"></td>
            </tr>
            <tr>
                <td width="50" align="center">국어</td>
                <td><input type="text" name="kor"></td>
            </tr>
            <tr>
                <td width="50" align="center">영어</td>
                <td><input type="text" name="eng"></td>
            </tr>
            <tr>
                <td width="50" align="center">수학</td>
                <td><input type="text" name="math"></td>
            </tr>
            <tr>
                <td colspan="2" style="text-align: center;">
                	<input type="submit" value="계산">
                	<input type="reset" value="취소">
                </td>
            </tr>
        </table>
	</form>
</body>
</html>
SungJukDTO.java
package com.bean;

import lombok.Getter;
import lombok.Setter;

@Getter
@Setter
public class SungJukDTO {
	private String name;
	private int kor, end, math, tot;
	private double avg;
}
SungJukController.java
	@RequestMapping(value="sungJuk/result.do", method = RequestMethod.POST)
	public ModelAndView result(@ModelAttribute SungJukDTO sungJukDTO) {
        int tot = sungJukDTO.getKor() + sungJukDTO.getEnd() + sungJukDTO.getMath();
        double avg = tot / 3.0;

        sungJukDTO.setTot(tot);
        sungJukDTO.setAvg(avg);

        ModelAndView mav = new ModelAndView();
        mav.addObject("sungJukDTO", sungJukDTO);
        mav.setViewName("/sungJuk/result");
        return mav;
	}
}
result.jsp
<%@ page language="java" contentType="text/html; charset=UTF-8"
    pageEncoding="UTF-8"%>
<!DOCTYPE html>
<html>
<head>
<meta charset="UTF-8">
<title>Insert title here</title>
<style type="text/css">
td {
	padding: 10px;
}
</style>
</head>
<body>
	<table border="1" style="border-collapse: collapse;">
	    <tr>
	        <td colspan="2" width="70" style="text-align: center;">${sungJukDTO.name}님의 성적</td>
	    </tr>
	    <tr>
	        <td width="70" align="center">총점</td>
	        <td>${sungJukDTO.tot}</td>
	    </tr>
	    <tr>
	        <td width="70" align="center">평균</td>
	        <td>${sungJukDTO.avg}</td>
	    </tr>
	</table>
</body>
</html>
${sungJukDTO.getName( )} = ${sungJukDTO.name} 같음 !!!

POST 방식으로 하면 한글이 깨진다 !!!
@RequestMapping(value="sungJuk/result.do", method = RequestMethod.POST
, produces = "text/html; charset=UTF-8")
여기서 한 한글처리는 응답데이터 한글 처리한 것이다.
public ModelAndView result(@ModelAttribute SungJukDTO sungJukDTO) {
응답데이터가 아닌 넘어오는 데이터이므로 web.xml에서 한글처리를 해줘야한다.
web.xml 한글처리
<filter> 코드 추가하기
  <!-- 넘어오는 파라메터 한글 인코딩 -->
  <filter>
        <filter-name>encodingFilter</filter-name>
        <filter-class>org.springframework.web.filter.CharacterEncodingFilter</filter-class>
        <init-param>
            <param-name>encoding</param-name>
            <param-value>UTF-8</param-value>
        </init-param>
  </filter>
  <filter-mapping>
        <filter-name>encodingFilter</filter-name>
        <url-pattern>/*</url-pattern> <!-- 모든 요청에 UTF-8 필터 적용 -->
  </filter-mapping>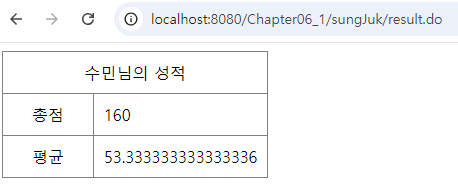
한글처리 잘 되는거 확인가능 !!!!
평균 소수점 2자리까지 찍기
result.jsp
<%@taglib prefix="fmt" uri="http://java.sun.com/jsp/jstl/fmt" %>
<td><fmt:formatNumber pattern="#.##">${sungJukDTO.avg}</fmt:formatNumber></td>
<%@ page language="java" contentType="text/html; charset=UTF-8"
    pageEncoding="UTF-8"%>
<%@taglib prefix="fmt" uri="http://java.sun.com/jsp/jstl/fmt" %>
<!DOCTYPE html>
<html>
<head>
<meta charset="UTF-8">
<title>Insert title here</title>
<style type="text/css">
td {
	padding: 10px;
}
</style>
</head>
<body>
	<table border="1" style="border-collapse: collapse;">
	    <tr>
	        <td colspan="2" width="70" style="text-align: center;">${sungJukDTO.name}님의 성적</td>
	    </tr>
	    <tr>
	        <td width="70" align="center">총점</td>
	        <td>${sungJukDTO.tot}</td>
	    </tr>
	    <tr>
	        <td width="70" align="center">평균</td>
	        <td><fmt:formatNumber pattern="#.##">${sungJukDTO.avg}</fmt:formatNumber></td>
	    </tr>
	</table>
</body>
</html>
XML 파일 두 개 만들기
스프링 설정 파일
/WEB-INF/dispatcher-servlet.xml → /WEB-INF/spring/appServlet/mvc-context.xml
servlet-context.xml
<?xml version="1.0" encoding="UTF-8"?>
<beans xmlns="http://www.springframework.org/schema/beans"
	xmlns:xsi="http://www.w3.org/2001/XMLSchema-instance"
	xmlns:context="http://www.springframework.org/schema/context"
	xsi:schemaLocation="http://www.springframework.org/schema/beans http://www.springframework.org/schema/beans/spring-beans.xsd
		http://www.springframework.org/schema/context http://www.springframework.org/schema/context/spring-context-4.3.xsd">

	<bean id="viewResolver" class="org.springframework.web.servlet.view.InternalResourceViewResolver">
		<property name="prefix" value="/WEB-INF"></property>
		<property name="suffix" value=".jsp"></property>
	</bean>

	<!-- <context:component-scan base-package="com.controller" /> -->
	<bean id="sumController" class="com.controller.SumController"></bean>
</beans>
mvc-context.xml
<?xml version="1.0" encoding="UTF-8"?>
<beans xmlns="http://www.springframework.org/schema/beans"
	xmlns:xsi="http://www.w3.org/2001/XMLSchema-instance"
	xmlns:context="http://www.springframework.org/schema/context"
	xsi:schemaLocation="http://www.springframework.org/schema/beans http://www.springframework.org/schema/beans/spring-beans.xsd
		http://www.springframework.org/schema/context http://www.springframework.org/schema/context/spring-context-4.3.xsd">

	<bean id="sungJukController" class="com.controller.SungJukController"></bean>
</beans>
2개의 파일을 따로 읽지않고 동시에 같이 읽는다 !!
web.xml
<param-value>
/WEB-INF/spring/appServlet/servlet-context.xml
/WEB-INF/spring/appServlet/mvc-context.xml
</param-value>
그냥 이렇게 여러개 찍으면 된다. ---> 생각보다 간단~
  <servlet>
	<servlet-name>dispatcher</servlet-name>
	<servlet-class>org.springframework.web.servlet.DispatcherServlet</servlet-class>
  	<init-param>
  		<param-name>contextConfigLocation</param-name>
  		<param-value>
  			/WEB-INF/spring/appServlet/servlet-context.xml
  			/WEB-INF/spring/appServlet/mvc-context.xml
  		</param-value>
  	</init-param>
  </servlet>

  <servlet-mapping>
	<servlet-name>dispatcher</servlet-name>
	<url-pattern>*.do</url-pattern>
  </servlet-mapping>

public String input(){
return "/sungJuk/input";
}
input( ) result( )는 내가 호출하는게 아닌 콜백함수이다. 스프링이 호출하는 것이다.
스프링이 URL에의해서 호출하게 된다.
public String input(HttpSession session) {
매개변수 인자에 넣게되면 스프링이 알아서 준다.
HttpSession session = request.getSession( ); 세션값을 이런식으로 만들필요가 없는 것이다 !!
※ STS3에서 Spring Legacy Project 생성 시 Spring MVC Project 메뉴가 안 나온다.
STS3를 2024년 02월 이후에 설치하면 3.0xml이 다운로드가 안되어 Spring MVC Project 메뉴를 찾을 수 없다.
먼저 STS를 꺼버린다.
해결 방법
1. STS workspace
\.metadata\.plugins\org.springsource.ide.eclipse.commons.content.core
2. https-cotent.xmL을 복사한다.

그리고 다시 STS를 켠다.

추가로 생긴거 확인할 수 있다 !!
Project : SpringProject ( Spring Framework + MyBatis(MySQL) + JSP )
=> Package: com.controller.SpringProject


Package를 3단계로 작성해야한다.
Package를 3단계로 설정할 때 패키지의 마지막을 Project명(SpringProject)과 똑같이 잡아야한다.
그래야 URL의 경로를 /SpringProject로 인식한다.
만약 Project명과 Package명을 다르게 할 경우에는 실행 시 URL를 패키지명으로 하면 된다.


pom.xmL
JDK와 Spring 버전을 변경 한다
default로 JDK는 1.6 으로 잡혀있다.
=> <java-version>11</java-version>로 변경
default로 스프링은 3.1.1 으로 잡혀있다.
=> <org.springframework-version>5.3.37</org.springframework-version> 변경

JSTL -- 이건 이미 있다.
		<dependency>
			<groupId>javax.servlet</groupId>
			<artifactId>jstl</artifactId>
			<version>1.2</version>
		</dependency>
Spring - jdbc
Connection Pool
MySQL
MyBatis
Lombok
		<!-- ********************************************************* -->
		<!-- Spring -->
		<dependency>
		    <groupId>org.springframework</groupId>
		    <artifactId>spring-jdbc</artifactId>
		    <version>5.3.37</version>
		</dependency>

		<!-- Connection Pool -->
		<dependency>
		    <groupId>org.apache.commons</groupId>
		    <artifactId>commons-collections4</artifactId>
		    <version>4.4</version>
		</dependency>

		<dependency>
		    <groupId>org.apache.commons</groupId>
		    <artifactId>commons-dbcp2</artifactId>
		    <version>2.11.0</version>
		</dependency>

		<!-- MySQL -->
		<dependency>
		    <groupId>com.mysql</groupId>
		    <artifactId>mysql-connector-j</artifactId>
		    <version>8.3.0</version>
		</dependency>

		<!--  MyBatis -->
		<dependency>
		    <groupId>org.mybatis</groupId>
		    <artifactId>mybatis</artifactId>
		    <version>3.5.16</version>
		</dependency>
		<dependency>
		    <groupId>org.mybatis</groupId>
		    <artifactId>mybatis-spring</artifactId>
		    <version>3.0.3</version>
		</dependency>

		<!-- Lombok  -->
		<dependency>
		    <groupId>org.projectlombok</groupId>
		    <artifactId>lombok</artifactId>
		    <version>1.18.30</version>
		    <scope>provided</scope>
		</dependency>
		<!-- ********************************************************* -->
프로젝트명 → 우클릭 → Properties
→ Project Facets(왼쪽) → Java 11로 변경
→ Runtimes(오른쪽 탭) → Apache Tomcat v9.0 체크
→ Apply
→ Java Build Path
→ Libraries(탭) → JRE System Library → JDK 11로 변경
→ Java Compiler → JDK 11
web.xml에서 다 지우고 시작하기 -- 오늘 한 번만 직접해보기위한 것 !!
<?xml version="1.0" encoding="UTF-8"?>
<web-app version="2.5" xmlns="http://java.sun.com/xml/ns/javaee"
	xmlns:xsi="http://www.w3.org/2001/XMLSchema-instance"
	xsi:schemaLocation="http://java.sun.com/xml/ns/javaee https://java.sun.com/xml/ns/javaee/web-app_2_5.xsd">


</web-app>servlet-context.xml도 다 지우기 !!
<?xml version="1.0" encoding="UTF-8"?>
<beans:beans xmlns="http://www.springframework.org/schema/mvc"
	xmlns:xsi="http://www.w3.org/2001/XMLSchema-instance"
	xmlns:beans="http://www.springframework.org/schema/beans"
	xmlns:context="http://www.springframework.org/schema/context"
	xsi:schemaLocation="http://www.springframework.org/schema/mvc https://www.springframework.org/schema/mvc/spring-mvc.xsd
		http://www.springframework.org/schema/beans https://www.springframework.org/schema/beans/spring-beans.xsd
		http://www.springframework.org/schema/context https://www.springframework.org/schema/context/spring-context.xsd">


</beans:beans>
root-context.xml
<?xml version="1.0" encoding="UTF-8"?>
<beans xmlns="http://www.springframework.org/schema/beans"
	xmlns:xsi="http://www.w3.org/2001/XMLSchema-instance"
	xsi:schemaLocation="http://www.springframework.org/schema/beans https://www.springframework.org/schema/beans/spring-beans.xsd">

	<!-- Root Context: defines shared resources visible to all other web components -->

</beans>
http://localhost:8080/SpringProject/
/로 끝나면 DispatcherServlet을 요청된다.
<?xml version="1.0" encoding="UTF-8"?>
<web-app version="2.5" xmlns="http://java.sun.com/xml/ns/javaee"
	xmlns:xsi="http://www.w3.org/2001/XMLSchema-instance"
	xsi:schemaLocation="http://java.sun.com/xml/ns/javaee https://java.sun.com/xml/ns/javaee/web-app_2_5.xsd">

	<!-- 웹과 관련된 WAC -->
	<servlet>
		<servlet-name>appServlet</servlet-name>
		<servlet-class>org.springframework.web.servlet.DispatcherServlet</servlet-class>
		<init-param>
			<param-name>contextConfigLocation</param-name>
			<param-value>/WEB-INF/spring/appServlet/servlet-context.xml</param-value>
		</init-param>
	</servlet>
	<servlet-mapping>
		<servlet-name>appServlet</servlet-name>
		<url-pattern>/</url-pattern>
	</servlet-mapping>
</web-app>
HomeController.java 지워버림
Project : SpringProject ( Spring Framework + MyBatis(MySQL) + JSP )
src/main/java
com.controller.SpringProject
MainController.java
package com.controller.SpringProject;

import org.springframework.stereotype.Controller;

@Controller
public class MainController {

}
servlet-context.xml
<?xml version="1.0" encoding="UTF-8"?>
<beans:beans xmlns="http://www.springframework.org/schema/mvc"
	xmlns:xsi="http://www.w3.org/2001/XMLSchema-instance"
	xmlns:beans="http://www.springframework.org/schema/beans"
	xmlns:context="http://www.springframework.org/schema/context"
	xsi:schemaLocation="http://www.springframework.org/schema/mvc https://www.springframework.org/schema/mvc/spring-mvc.xsd
		http://www.springframework.org/schema/beans https://www.springframework.org/schema/beans/spring-beans.xsd
		http://www.springframework.org/schema/context https://www.springframework.org/schema/context/spring-context.xsd">

	<context:component-scan base-package="com.controller.SpringProgject"></context:component-scan>
</beans:beans>
MainController.java
package com.controller.SpringProject;

import org.springframework.stereotype.Controller;
import org.springframework.web.bind.annotation.RequestMapping;

@Controller
public class MainController {
	@RequestMapping(value="/")
	public String index() {
		return "/index";
	}
}
servlet-context.xml
<?xml version="1.0" encoding="UTF-8"?>
<beans:beans xmlns="http://www.springframework.org/schema/mvc"
	xmlns:xsi="http://www.w3.org/2001/XMLSchema-instance"
	xmlns:beans="http://www.springframework.org/schema/beans"
	xmlns:context="http://www.springframework.org/schema/context"
	xsi:schemaLocation="http://www.springframework.org/schema/mvc https://www.springframework.org/schema/mvc/spring-mvc.xsd
		http://www.springframework.org/schema/beans https://www.springframework.org/schema/beans/spring-beans.xsd
		http://www.springframework.org/schema/context https://www.springframework.org/schema/context/spring-context.xsd">

	<bean id="viewResolver" class="org.springframework.web.servlet.view.InternalResourceViewResolver">
		<property name="prefix" value="/WEB-INF"></property>
		<property name="suffix" value=".jsp"></property>
	</bean>

	<context:component-scan base-package="com.controller.SpringProgject"></context:component-scan>
</beans:beans>
에러나므로 밑에 코드로 바꾸기 !!
<?xml version="1.0" encoding="UTF-8"?>
<beans:beans xmlns="http://www.springframework.org/schema/mvc"
	xmlns:xsi="http://www.w3.org/2001/XMLSchema-instance"
	xmlns:beans="http://www.springframework.org/schema/beans"
	xmlns:context="http://www.springframework.org/schema/context"
	xsi:schemaLocation="http://www.springframework.org/schema/mvc https://www.springframework.org/schema/mvc/spring-mvc.xsd
		http://www.springframework.org/schema/beans https://www.springframework.org/schema/beans/spring-beans.xsd
		http://www.springframework.org/schema/context https://www.springframework.org/schema/context/spring-context.xsd">

	<beans:bean id="viewResolver" class="org.springframework.web.servlet.view.InternalResourceViewResolver">
		<beans:property name="prefix" value="/WEB-INF" />
		<beans:property name="suffix" value=".jsp" />
	</beans:bean>

	<context:component-scan base-package="com.controller.SpringProgject"></context:component-scan>
</beans:beans>
index.jsp
<%@ page language="java" contentType="text/html; charset=UTF-8"
    pageEncoding="UTF-8"%>
<!DOCTYPE html>
<html>
<head>
<meta charset="UTF-8">
<title>Insert title here</title>
</head>
<body>
<h2>*** 메인화면 ***</h2>
<h3>
	<p><a href="http://localhost:8080/spring/user/writeForm">입력</a></p>
	<p><a href="/spring/user/list?pg=1">출력</a></p>
</h3>
</body>
</html>
URL 변경
http://localhost:8080/SpringProject/ ===> http://localhost:8080/spring


DispatcherServlet
↓
user.controller
UserController.java
↓
DispatcherServlet
↓
user(폴더)
writeForm.jsp
index.jsp
<%@ page language="java" contentType="text/html; charset=UTF-8"
    pageEncoding="UTF-8"%>
<!DOCTYPE html>
<html>
<head>
<meta charset="UTF-8">
<title>Insert title here</title>
</head>
<body>
<h2>*** 메인화면 ***</h2>
<h3>
	<p><a href="/spring/user/writeForm">입력</a></p>
	<p><a href="/spring/user/list?pg=1">출력</a></p>
</h3>
</body>
</html>
UserController.java
package user.controller;

import org.springframework.stereotype.Controller;
import org.springframework.web.bind.annotation.RequestMapping;
import org.springframework.web.bind.annotation.RequestMethod;

@Controller
public class UserController {
	@RequestMapping(value="user/writeForm", method = RequestMethod.GET)//value=>요청url
	public String writeForm() {
		return "/user/writeForm";
	}
}
servlet-context.xml
<context:component-scan base-package="user.controller" />view 폴더 지워버렸다.
writeForm.jsp
<%@ page language="java" contentType="text/html; charset=UTF-8"
pageEncoding="UTF-8"%>
<!DOCTYPE html>
<html>
<head>
<meta charset="UTF-8">
<title>회원가입 페이지</title>
<style type="text/css">
body {
background-color: #FFE2FA;
font-family: 'Arial', sans-serif;
margin: 0;
padding: 0;
display: flex;
justify-content: center;
align-items: center;
height: 80vh;
flex-direction: column;
}
table {
border-collapse: collapse;
border-radius: 10px;
background-color: white;
width: 500px;
padding: 15px;
box-shadow: 0 4px 8px rgba(0, 0, 0, 0.1);
margin: 0 auto;
text-align: center;
}
th, td {
padding: 8px 10px;
text-align: left;
font-size: 14px;
}
th {
color: #333;
font-size: 16px;
text-align: center;
}
td {
color: #333;
}
div {
color: red;
font-size: 8pt;
font-weight: bold;
margin-top: 5px;
}
input[type="text"], input[type="password"], select {
margin-top: 5px;
padding: 5px;
border: 1px solid #CCC;
border-radius: 5px;
box-sizing: border-box;
}
input[type="text"][size], input[type="password"][size] {
width: auto;
}
input[type="button"], input[type="submit"], input[type="reset"] {
background-color: #FF9ADB;
border: none;
font-size: 14px;
padding: 6px 10px;
border-radius: 5px;
cursor: pointer;
color: white;
transition: background-color 0.3s ease;
margin: 4px;
}
input[type="button"]:hover, input[type="submit"]:hover, input[type="reset"]:hover {
background-color: #FF70C0;
}
img {
margin-bottom: 15px;
cursor: pointer;
display: block;
}
table td[colspan="2"] {
text-align: center;
}
</style>
</head>
<body>
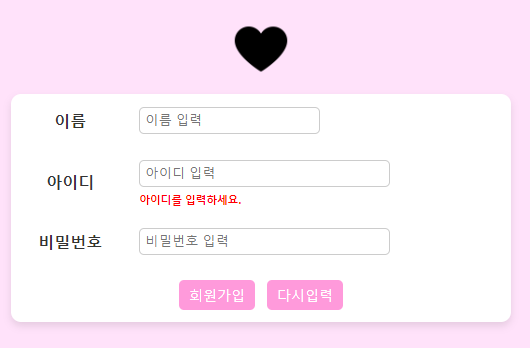
<img src="../image/free-icon-love-4096198.png" alt="홈" width="60" height="60" />
<form name="WriteForm" method="get">
<table>
<tr>
<th>이름</th>
<td>
<input type="text" name="name" id="name" placeholder="이름 입력" size="20"/>
<div id="nameDiv"></div>
</td>
</tr>
<tr>
<th>아이디</th>
<td>
<input type="text" name="id" id="id" placeholder="아이디 입력" size="30"/>
<input type="hidden" id="check" value=""/>
<div id="idDiv"></div>
</td>
</tr>
<tr>
<th>비밀번호</th>
<td>
<input type="password" name="pwd" id="pwd" placeholder="비밀번호 입력" size="30"/>
<div id="pwdDiv"></div>
</td>
</tr>
<tr>
<td colspan="2" align="center">
<input type="submit" value="회원가입" />
<input type="reset" value="다시입력" />
</td>
</tr>
</table>
</form>
<script type="text/javascript" src="http://code.jquery.com/jquery-3.7.1.min.js"></script>
<script type="../js/write.js"></script>
</body>
</html>src
main
webapp
WEB-INF
css
user.css
js
user.js
css 따로뺴기 !!
user.css
@charset "UTF-8";
body {
    background-color: #FFE2FA;
    font-family: 'Arial', sans-serif;
    margin: 0;
    padding: 0;
    display: flex;
    justify-content: center;
    align-items: center;
    height: 80vh;
    flex-direction: column;
}

table {
    border-collapse: collapse;
    border-radius: 10px;
    background-color: white;
    width: 500px;
    padding: 15px;
    box-shadow: 0 4px 8px rgba(0, 0, 0, 0.1);
    margin: 0 auto;
    text-align: center;
}

th, td {
    padding: 8px 10px;
    text-align: left;
    font-size: 14px;
}

th {
    color: #333;
    font-size: 16px;
    text-align: center;
}

td {
    color: #333;
}

div {
    color: red;
    font-size: 8pt;
    font-weight: bold;
    margin-top: 5px;
}

input[type="text"], input[type="password"], select {
    margin-top: 5px;
    padding: 5px;
    border: 1px solid #CCC;
    border-radius: 5px;
    box-sizing: border-box;
}

input[type="text"][size], input[type="password"][size] {
    width: auto;
}

input[type="button"], input[type="submit"], input[type="reset"] {
    background-color: #FF9ADB;
    border: none;
    font-size: 14px;
    padding: 6px 10px;
    border-radius: 5px;
    cursor: pointer;
    color: white;
    transition: background-color 0.3s ease;
    margin: 4px;
}

input[type="button"]:hover, input[type="submit"]:hover, input[type="reset"]:hover {
    background-color: #FF70C0;
}

img {
    margin-bottom: 15px;
    cursor: pointer;
    display: block;
}

table td[colspan="2"] {
    text-align: center;
}
writeForm.jsp
<link rel="stylesheet" href="../css/user.css">
<title>회원가입 페이지</title>
<link rel="stylesheet" href="../css/user.css">
</head>
http://localhost:8080/spring/css/user.css
spring/ /로 끝나면 dispatcherServlet으로 가라인데 css는 controller가 없으므로 no mapping 연결이 안되는 것이다.
css는 controller로 가지 못하게 막아야한다 !!
<resources location="" mapping="/css/**"></resources>
경로가 한 개이던 두 개이던 상관없다 ** 로 처리하기
<resources location="/WEB-INF/css" mapping="/css/**"></resources>
css로 시작하는 애들이라면 dispatcherServlet으로 가지말고 /WEB-INF/css 여기로 가라 하는 것 !
<annotation-driven /> - 기본적으로 가지고 있는(내장되어있는) 설정파일은 스프링이 알아서해라
servlet-context.xml
<?xml version="1.0" encoding="UTF-8"?>
<beans:beans xmlns="http://www.springframework.org/schema/mvc"
	xmlns:xsi="http://www.w3.org/2001/XMLSchema-instance"
	xmlns:beans="http://www.springframework.org/schema/beans"
	xmlns:context="http://www.springframework.org/schema/context"
	xsi:schemaLocation="http://www.springframework.org/schema/mvc https://www.springframework.org/schema/mvc/spring-mvc.xsd
		http://www.springframework.org/schema/beans https://www.springframework.org/schema/beans/spring-beans.xsd
		http://www.springframework.org/schema/context https://www.springframework.org/schema/context/spring-context.xsd">

	<annotation-driven />

	<beans:bean id="viewResolver" class="org.springframework.web.servlet.view.InternalResourceViewResolver">
		<beans:property name="prefix" value="/WEB-INF" />
		<beans:property name="suffix" value=".jsp" />
	</beans:bean>

	<context:component-scan base-package="com.controller.SpringProject" />
	<context:component-scan base-package="user.controller" />

	<resources location="/WEB-INF/css/" mapping="/css/**"></resources>
	<resources location="/WEB-INF/js/" mapping="/js/**"></resources>
	<resources location="/WEB-INF/image/" mapping="/image/**"></resources>
</beans:beans>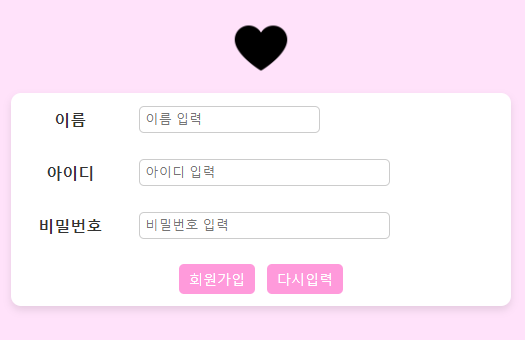
이미지 누르면 메인화면으로 이동하기위한 코드 추가 !!
<a href="/spring/"><img src="../image/free-icon-love-4096198.png" alt="홈" width="60" height="60"/></a>write.js
$(function () {
		console.log('dsa');
    $('#id').on('focusout', function(){
        $('#idDiv').empty();
        let id = $('#id').val();

        if (id === '') {
            $('#idDiv').html('아이디를 입력하세요.').css('color', 'red');
        }
    });
});
web.xml
	<!-- 웹과 독립된 WAC -->
	<context-param>
		<param-name>contextConfigLocation</param-name>
		<param-value>/WEB-INF/spring/root-context.xml</param-value>
	</context-param>
	<listener>
		<listener-class>org.springframework.web.context.ContextLoaderListener</listener-class>
	</listener>
좋은 그림이다 !! 참고하기 !!
